
How 3D Filament is Made..
Building Spools
Filament is a vital part of additive manufacturing: It’s the “food source” of FDM 3D printing. As the industry has grown, the variety of available filaments has too. Nowadays, there are numerous brands, various sizes, and a wide range of new materials.
Where does filament come from, anyone? The filament-making process can be broken down into five steps, beginning with raw materials and ending with a spool at your doorstep.
In this article, we explain the process of how 3D printing filament is made. Given the diversity of filament types and the variation in how they’re made, we’ll focus on the main steps common to all filaments.
Step 1: Plastic
The first step in the filament production process is manufacturing the plastic. During refinement, crude oil is heated in an industrial furnace, which separates its many different components. One of the components, naphtha, is most involved in making plastics.
Naphtha, catalysts, and other chemical components are chemically bonded in a polymerization reactor. Then, the products of the polymerized naphtha are compounded and processed. This process involves melting the products and mixing them with other materials to form plastic. The resulting plastic is then granulated into small pieces known as pellets or resin.
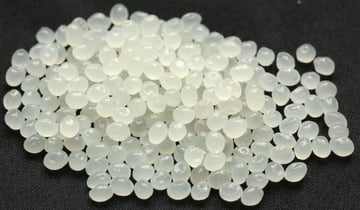
Plastic suppliers typically manufacture clear or white pellets and resins. This allows their consumers, such as filament makers, more control over the coloration process.
In comparison to spools of filament, pellets are very inexpensive: You can buy 1 kg of pellets for a fraction of the cost of 1 kg of filament. This is, of course, because filament companies transform the raw materials into finished products whose prices factor in the cost of the transformation process as well as the companies’ desired profit margin.
Step 2: Preparation
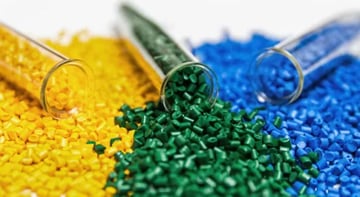
The second step in the process is preparing the pellets for the following step, shaping, where they’ll be solidified into their string-like form. The pellets are put into an industrial blender and mixed with additives in order to create a consistent blend and contribute specific properties to the filament.
Additives can include colorants, which determine color, or other things that contribute properties such as impact resistance, strength, structural integrity, and even magnetic properties. Exotic filaments, such as wood, are made by mixing special additives such as sawdust or wood particles with the plastic pellets.
Drying
Once the pellets are properly mixed, they move on to the drying phase. Like filament, the pellets are hygroscopic, meaning they absorb moisture from the air. This can deform or degrade the plastic, therefore, removing any moisture from the pellets is necessary to ensure the production of quality filament. Pellets are typically dried around 60 °C to 80 °C for a few hours, but the process varies depending on the manufacturer.
Step 3: Shaping
The third step of the filament production process is shaping the pellets into a string shape, a process that includes heating and cooling. This is the main event, so to speak.
Heating
In the first part of shaping, the pellets are fed into a filament extruder, which includes a heating chamber. In this chamber, the individual pellets are melted into a gooey substance so that they can be shaped easily.
In this state, the pellets bond together and are shaped into a consistent, stranded material. The string-like bonded material, better known as filament, leaves the heating chamber through a round nozzle and moves on to the cooling section.
Cooling
After the filament leaves the heating section, it’s pulled through multiple water chambers. The first chamber is full of warm water, which is an important factor in achieving a rounded filament. The right temperature setting according to the material helps to prevent oval-shaped filament, which is problematic for 3D printing.
The second chamber is full of cool water, which cools the filament down and solidifies it into its new shape. The speed by which the filament is pulled determines the diameter of the filament. A slower speed will result in a larger diameter, while a faster speed does the opposite.
Step 4: Spooling
Next, motors pull the filament from the cooling chamber to the spooling mechanism. The spooling process starts with measuring the filament’s diameter by a laser device to ensure it’s within the tolerance of the target diameter, most likely 1.75 mm or 2.85 mm.
The filament is then attached to a spool and wound around it. Once sensors detect that the spool is full, the filament is cut and secured. The process starts again, filling the next spool until the batch of filament is exhausted.
Step 5: Packaging
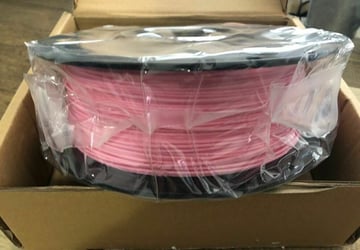
The last step is the process of readying the spools for selling. They are branded with company-specific packaging, which often takes the form of brand stickers on spools. Packaging also typically includes labels and barcodes for business and organizational purposes.
Once the filament has been properly packaged, it’s ready to be shipped to customers. Spools that are not immediately shipped out are stored until someone like you orders it.
This whole process happens over and over every day to supply the fuel for you and your 3D printer. As you can see, it takes a lot to ensure that the filament you receive is high quality. The next time you tear open a package of newly-arrived filament, you’ll have a better sense of all the work that happens behind the scenes.